New Out of Stock Badge Display for Shop Products
Display out of stock badges on products instead of hiding them from shops. Keep items visible to customers with clear inventory status messaging.
Out of Stock Display
On the product level, you can now enable a show out of stock badge in place of the Add to Cart button. When this setting is turned on, the product will not disappear from the shop when inventory reaches zero.


Go to Shop > Products and enable the option called "Show out of stock". If you want to update multiple products with this option at once, you can do so by selecting the products you want and using the bulk update action. When selected, the product will still show in the customer portal shop and public shops but with an out of stock message.
Conditional Package Logic, Bulk Location Updates & Team User File Management
Control signup flow with parent packages, bulk update locations and products, add team user files, filter by special criteria, and include upcoming services in emails.
Team User Files
You are now able to add files to team user accounts! These documents are restricted by superuser status and access can be turned on for other team users too in the team user's individual settings.


Bulk Updates
It's now possible to make bulk updates on the location level and store product level.
Go to Customers > Locations > Filter > Select All > Actions > Bulk Update. From here, you can update service notes, photo requirements, notification emails, service windows, and more!
To update store products, go to Shop > Products > Filter > Select All > Actions > Bulk Update. From here, you can update email confirmation text, tag information, whether the products are taxable, and more!
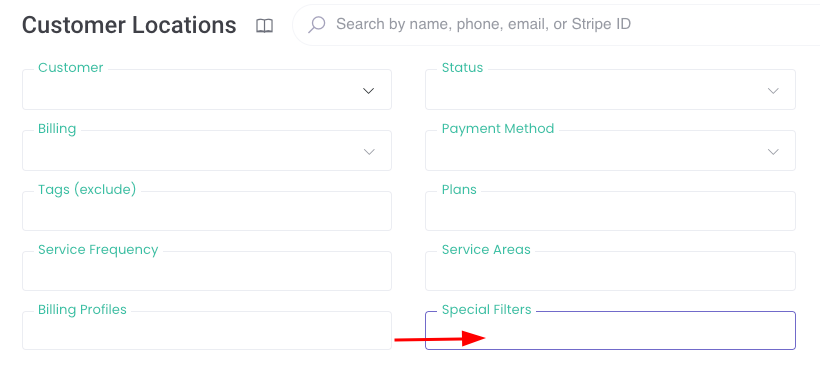
Special Filters
On the customer location level (Customers > Locations), you can now filter by "Special Filters" - this includes, duplicate address, service notes, unassigned locations, service windows, and more!
Trial Period Banner on Signup Form
The sign-up form will now preview the number of trial days in the price banner.

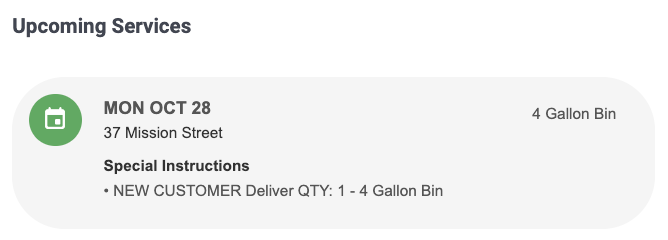
Upcoming Services in Direct Emails
You can now include the Upcoming Services in your direct email. The customer will be able to preview their future service dates along with any driver actions.

Parent Packages
Here's how Parent Packages can help you control the services offered, based on what customers select upfront.
How it Works
Navigate to Services > Packages and click on a package to edit it. You’ll notice a new field called "Parent Packages."
Example in Action:
Let’s say your signup process starts by offering two service plans:Plan A – Weekly Pickup
Plan B – Biweekly Pickup
If you only want customers on Plan A to access additional services—like bin or toter cleaning—you can set Plan A as a parent package for the bin cleaning option.
Impact on Signup Flow:
When a customer selects Plan A at the beginning, they’ll see the bin cleaning option later in the process. But if they choose Plan B, that option won’t appear.
Key Takeaway
Any package with a parent package won’t be visible unless the customer has already chosen the relevant parent. This gives you full control over the signup flow, ensuring customers only see services that align with their previous choices, streamlining the process for both them and your operations.
Major List Page Redesign: Enhanced Filtering, Performance & Customization
Streamlined list pages with bookmarkable filters, customizable column views, faster loading, and improved navigation. Enhanced interface for better workflow.
We're thrilled to announce a significant update to our list pages, designed to streamline your workflow and improve your experience. Here's whats new:
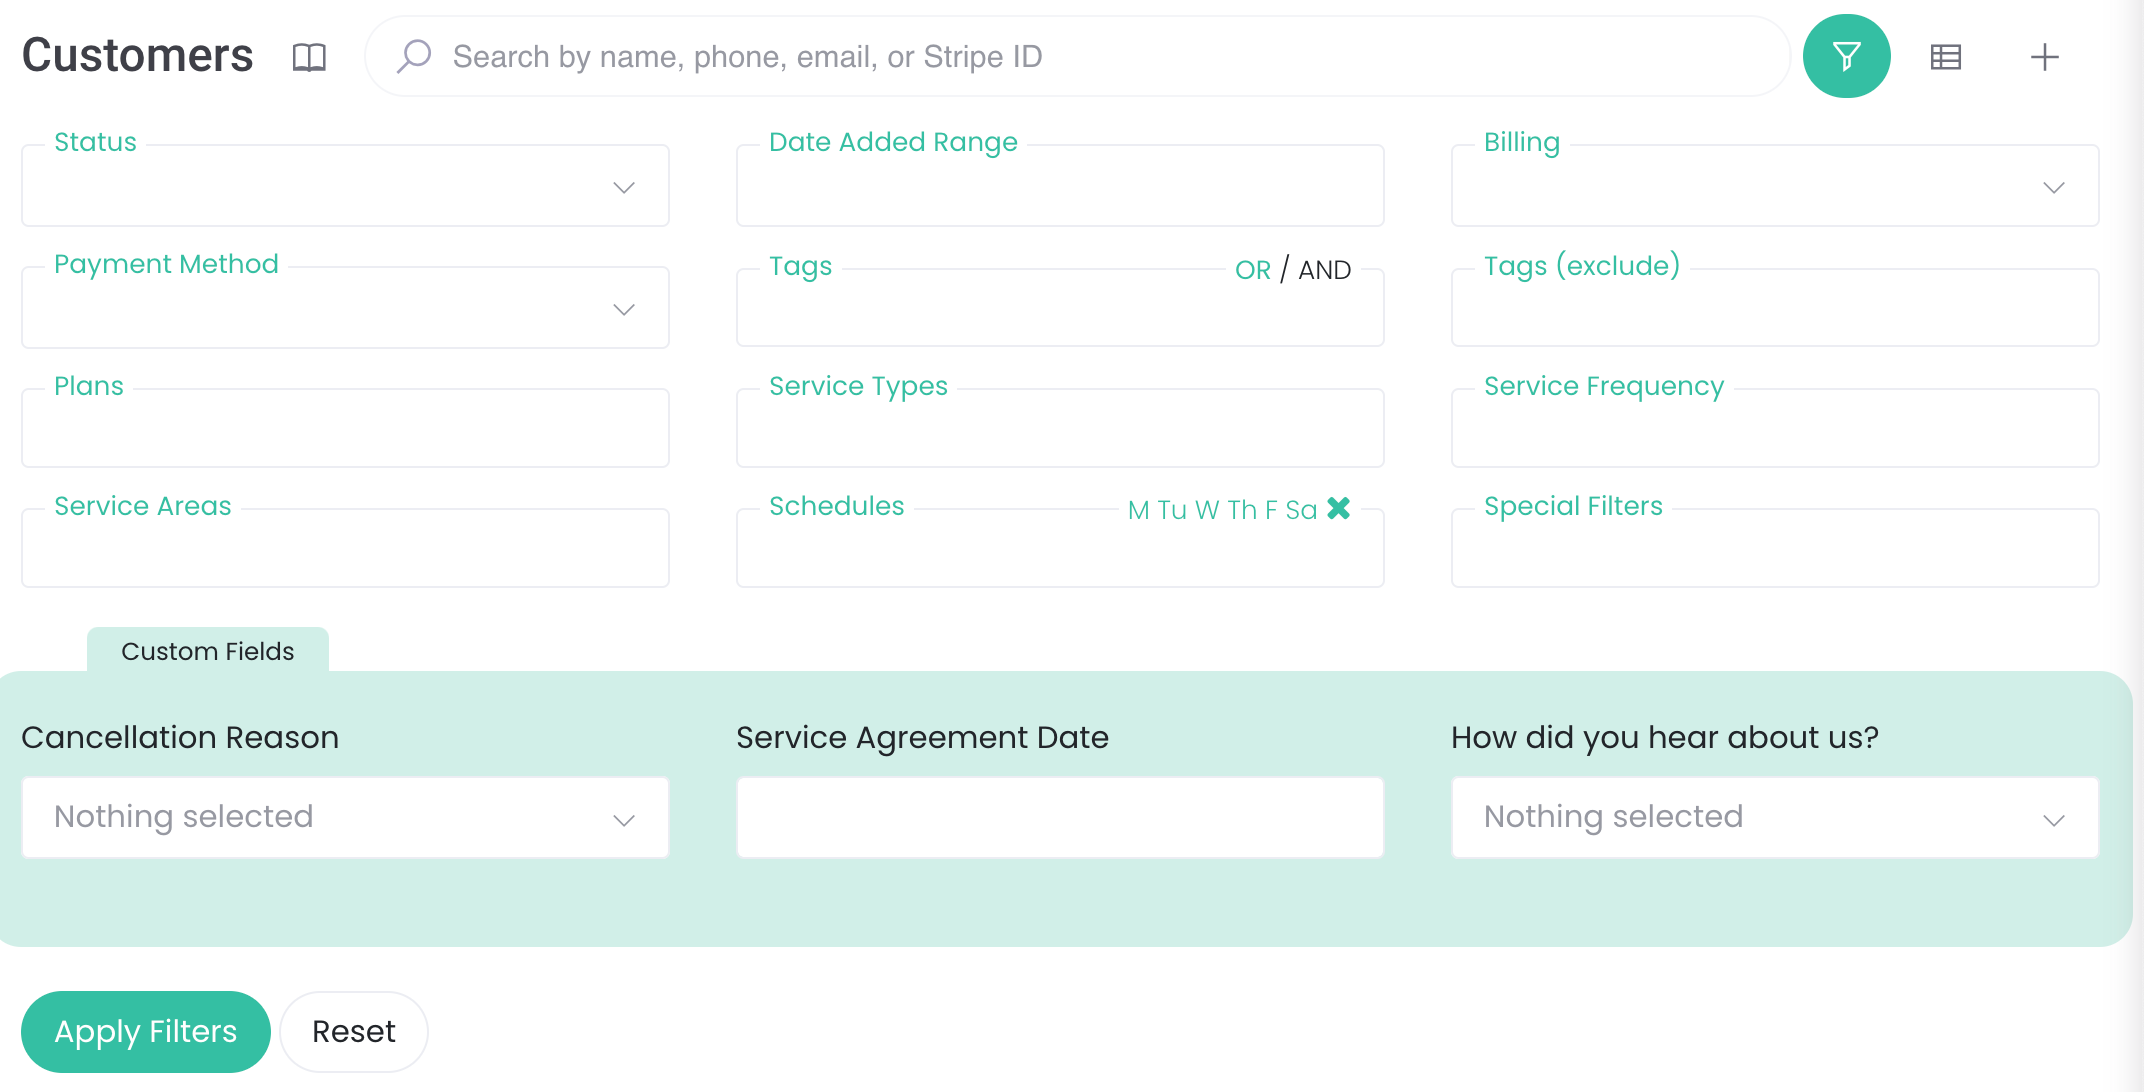
Smarter Filtering & Navigation
URL-tracked filters: Bookmark your common filter configurations for quick access.
Browser-friendly: Use forward/back buttons without losing your filter settings.
New "Apply Filters" button: For more efficient control over your search results. NOTE: The filters in the Advanced Search will no longer automatically trigger the table to refresh. You must click "Apply Filters".
Customizable Views
Toggle optional columns: Personalize your list view to show exactly what you need.

Enhanced Performance & Usability
Faster loading: Experience quicker load times.
Compact design: A cleaner, more streamlined interface for improved readability.
Standardized object interactions:
Edit objects with the new pencil icon.
View non-editable objects (like status pages) with the eye icon.
Quick-add functionality: Look for the icon in the top right to quickly add new objects.

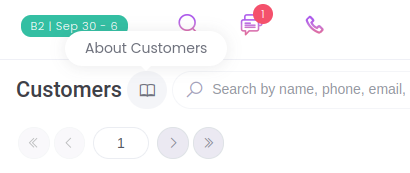
Improved User Guidance
About text: Click the icon next to list titles for available actions and descriptions.
Filter and column notifications: Green badges show the number of active filters when the menu is collapsed
Portal Credits Display, Work Type Restrictions & Enhanced CSV Exports
Display account credits in portal, restrict work types by team users, export shop orders to CSV, add customer titles, and view individual user impact stats.
Account Credits Preview on Portal
Customers will now be able to view their account credits from the dashboard of the customer portal. It's located directly above the subscription information:

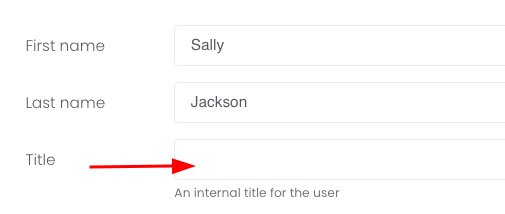
Customer User Titles
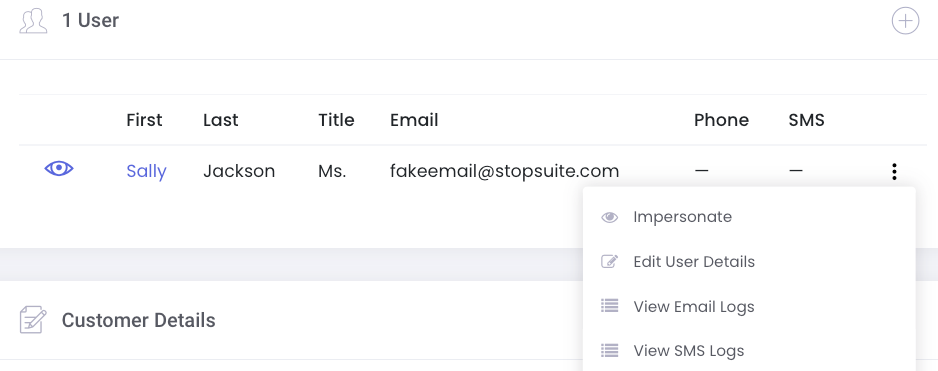
You can add a title (Mrs., Mr., Ms., Mx., etc.) to a customer user and include this variable in email communication. To add the variable go to the customer's detail page and click the three dots next to their user and edit user details:
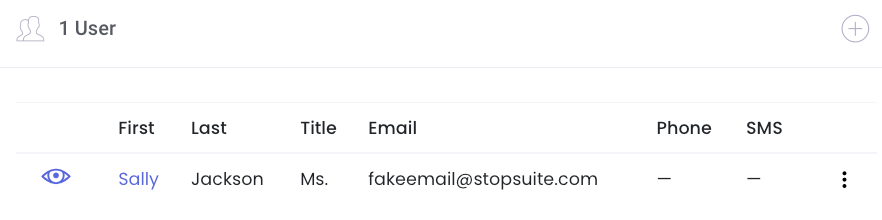
The title will also preview on the customer's detail page:
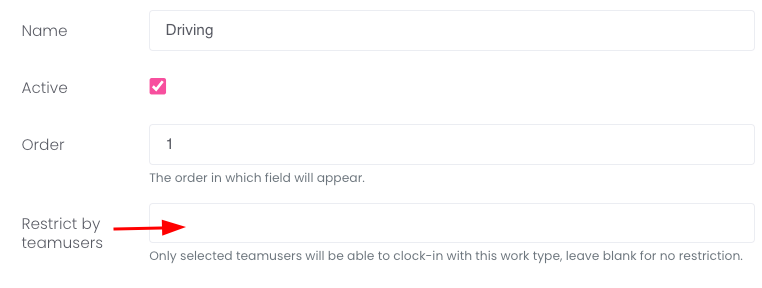
Restrict Work Types by Team Users
You can now restrict work types by team users. This is helpful if you use the clock-in/clock-out feature on the driver app and have multiple work types that don't apply to all team users. To enable this setting, go to Team > Work Types. Edit a work type and enter the team users in the restrict by field:
Vehicle Preview on Calendar Widget
The dashboard calendar widget now displays the name of the vehicle for each route. An easy way to catch a quick glance at your fleet!

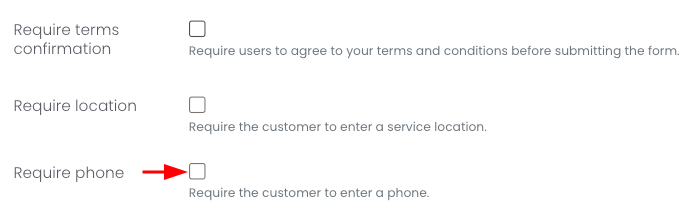
Require Phone on Custom Forms
In addition to the other "require" settings, you can now require the phone field on your custom forms:
View Customer Email and SMS Logs from User
To quickly view email and SMS logs for a particular customer, go to their customer detail page and scroll down to their users. Click the three dots and then View Email Logs or View SMS Logs:
Hide Inactive Vehicles and Team Users
By default, the filter on both the team user list (Team > Team Users) and vehicle list (Trip Inspections > Vehicles) is set to Active status. This means any inactive vehicles and team users will be hidden:

CSV Export and Filtering on Shop Orders
From the shop orders page (Shop > Orders), you can now select multiple orders and download a CSV. In addition, you can also filter the shop orders down by tags, order date, delivery date, products, customer and shop!
CSV Export for Vehicles
From the vehicles list page (Trip Inspections > Vehicles), you can select all vehicles and download a CSV.
Individual "Customer User" Impact Statistics
We have added a Customer Impact Statistic JSON endpoint on the user level. This can be helpful for customers with multiple locations and multiple users. For example, you have a customer that has 10 locations. One user only has access to one location and that's the only data they need access to.
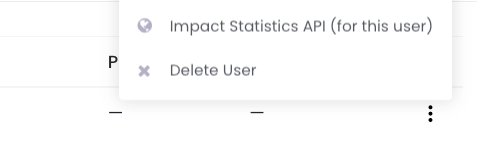
From there, you'll be brought to a new page. You can copy and paste the URL to send to your customer.
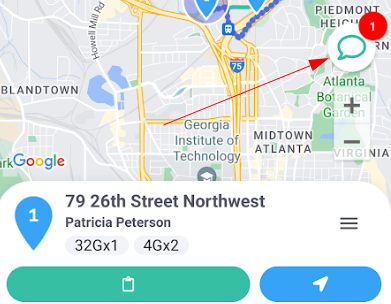
Introducing Real-Time Driver Chat: Route-Specific Communication
Connect with drivers instantly through route-specific chat rooms. Real-time messaging with historic chat logs improves support and fleet management efficiency.
Key Features:
Route-Specific Chat Rooms: Each route now has its own dedicated chat space.
Real-Time Communication: Instantly connect with drivers while they're on route.
Easy Access:
Drivers: Simply tap the chat icon in the driver app
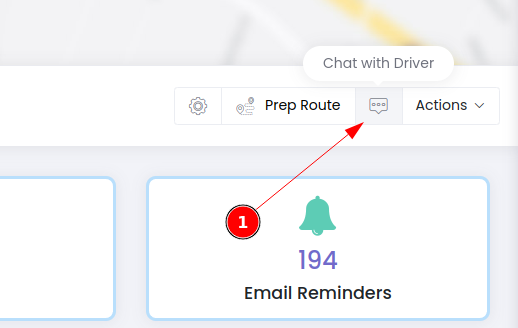
Admins: Click the truck icon in the stopSuite admin header

This powerful new tool will help you:
Resolve issues quickly
Provide timely updates
Enhance driver support
Improve overall fleet management
Record historic chat logs for each route
By default, the driver chat feature is disabled. To enable it, head to Settings > Driver App and click the checkbox:

Each chat session is logged and can be accessed from the route page's toolbar:
NOTE: The chat feature requires v1.26 or greater on the driver app. Please encourage your drivers to always upgrade the driver app to the latest version.
ANOTHER NOTE: If you enable the chat feature while the driver is using the app, the driver will need to hit "refresh route" from the route menu to use the chat feature.